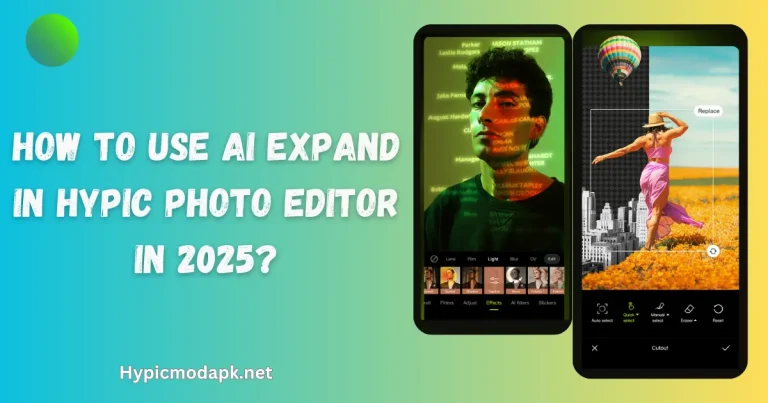
How to Use Cutout in Hypic Photo Editor | Ultimate 2025 Guide
Cutting out parts of an image or isolating subjects is a common need for photo editors. The Cutout feature in Hypic Photo Editor allows users to do this effortlessly in 2025.
In just a few steps, you can remove backgrounds or isolate elements with precision and ease, making Hypic an excellent choice for professionals and casual users alike.
How to Use the Cutout Feature in Hypic Photo Editor
The Cutout tool in Hypic Photo Editor is intuitive and simple to use, even for beginners. Follow the steps below for a detailed walkthrough:
Step 1: Launch the App
Download and open the Hypic Photo Editor app on your device. Ensure that the app is updated to the latest 2025 version for the best experience.
Step 2: Import Your Image
Tap on the “Import” option to select the image you want to edit. You can choose a photo from your gallery or take one directly using the camera.
Step 3: Access the Cutout Tool
Navigate to the editing toolbar and select the “Cutout” feature. The tool is designed to automatically detect subjects, making it easier to separate the foreground from the background.
Step 4: Choose the Cutout Mode
- Automatic Cutout: Ideal for quick edits. The AI detects the subject and removes the background automatically.
- Manual Cutout: Allows for more control, enabling you to use a brush or lasso tool to define the subject area manually.
- Shape Cutout: Provides predefined shapes (e.g., circles, squares) to isolate parts of the image.
Step 5: Refine the Edges
After the initial cutout, refine the edges using the “Edge Smoothing” tool. Adjust the transparency, feathering, and other settings for a professional finish.
Step 6: Add Backgrounds or Save
Once satisfied with the cutout, you can:
- Replace the background with a solid color or another image.
- Save the cutout as a PNG file for future use.
Download Hypic Mod APK
Why Choose Hypic Photo Editor’s Cutout Tool?
The Cutout tool in Hypic Photo Editor stands out due to its:
- AI Precision: Ensures seamless separation of subjects and backgrounds.
- Ease of Use: User-friendly interface designed for all skill levels.
- Customization Options: Offers both automatic and manual editing modes.
Tips for Using the Cutout Feature Effectively
- Choose High-Quality Images: Clear images make it easier for the AI to detect subjects.
- Zoom In for Manual Edits: For intricate areas like hair or edges, use the manual mode with zoom for precision.
- Experiment with Backgrounds: Replace the background creatively to enhance your final image.
Advanced Features of the Cutout Tool in Hypic Photo Editor
Hypic Photo Editor offers additional features within the Cutout tool, making it more versatile and powerful. These advanced features enhance your editing experience, allowing you to create professional-quality images.
1. AI-Powered Object Detection
The AI in Hypic Photo Editor can identify complex objects such as:
- People
- Animals
- Textures
- Detailed shapes like hair or transparent objects
This feature minimizes the effort required for manual adjustments, giving users fast and precise results.
2. Layer Management
The Cutout tool supports layer-based editing, enabling you to:
- Stack multiple layers for composite images.
- Adjust the order of layers to prioritize specific elements.
- Apply unique effects like shadows or blending to individual layers.
Pro Tip: Use the layer opacity slider for a professional, blended look.
3. Batch Processing
In 2025, the Cutout tool includes a batch processing feature, allowing users to:
- Apply the Cutout feature to multiple images simultaneously.
- Save time on repetitive edits, especially useful for content creators and designers.
4. Fine-Tuning Tools
For precise edits, Hypic Photo Editor provides fine-tuning options:
- Edge Detection: Enhances accuracy around sharp corners or intricate details.
- Feathering: Softens edges for a seamless transition between the subject and background.
- Color Adjustment: Matches the cutout with the background for a cohesive look.
5. Background Options
After using the Cutout tool, you can choose from a variety of background options:
- Preloaded Templates: Select from artistic or plain backgrounds provided by the app.
- Custom Uploads: Import your own images to use as backgrounds.
- Transparent Backgrounds: Save the subject with no background, ideal for creating PNG files for logos or e-commerce use.
Creative Ways to Use the Cutout Feature
The Cutout tool isn’t limited to removing backgrounds. Here are some creative ways to utilize it:
1. Personalized Greeting Cards
Cut out subjects from photos and overlay them on custom designs to create unique cards for occasions like birthdays or anniversaries.
2. Social Media Posts
Enhance your social media content by isolating subjects and using bold, vibrant backgrounds to grab attention.
3. Product Photography
E-commerce sellers can use the Cutout tool to create clean, professional product images with white or custom backgrounds.
4. Artistic Collages
Combine multiple cutouts into a single frame to create eye-catching photo collages.
Hypic Photo Editor: Ideal for All Users
Whether you’re a professional editor or a casual user, Hypic Photo Editor makes it easy to:
- Remove unwanted elements from images.
- Create unique and creative visuals.
- Save time with its intuitive and automated features.
Step-by-Step Guide to Achieving Professional Results with Hypic’s Cutout Tool
The Cutout feature in Hypic Photo Editor offers unparalleled versatility, allowing users to achieve professional-grade results with minimal effort. Here’s a detailed step-by-step guide for mastering the tool:
1. Select the Right Image
- Start by choosing a high-resolution image for better subject detection.
- Avoid blurry or low-light photos, as they can reduce the effectiveness of the tool.
Tip: Use well-lit images with clear subject-background contrast for optimal results.
2. Use the Preview Function
Once you apply the Cutout tool, use the Preview option to:
- View the initial cutout.
- Identify areas that may need adjustments, such as edges or intricate details.
3. Adjust Brush Settings (Manual Mode)
In manual mode, customize your brush settings for precision:
- Brush Size: Use smaller brushes for detailed areas like hair or fingers.
- Hardness: Adjust the edge hardness to make transitions smoother or sharper.
Pro Tip: Combine the zoom function with precise brush strokes for maximum control.
4. Enhance with Filters and Effects
After isolating your subject, enhance it further with Hypic’s editing features:
- Filters: Apply creative filters to give your image a unique look.
- Lighting Adjustments: Adjust brightness, contrast, and saturation to match the subject with its background.
5. Add Custom Backgrounds
Replace the removed background with a new one:
- Use Hypic’s library of backgrounds for preloaded options.
- Upload your custom backgrounds for a personal touch.
- Experiment with gradients or blurred backgrounds for a modern aesthetic.
6. Save in High Quality
After completing your edit:
- Save the image in PNG format for transparent backgrounds.
- Use JPEG for compressed file sizes suitable for online uploads.
Pro Tip: Always save a copy of the original file to allow for future adjustments.
Common Mistakes to Avoid
Even with Hypic Photo Editor’s advanced tools, users can encounter challenges. Here’s how to avoid common pitfalls:
1. Relying Solely on Automatic Mode
While the AI-powered automatic mode is efficient, it may not always achieve perfection for complex images. Use the manual mode for better control over fine details.
2. Ignoring Edge Refinement
Skipping edge refinement can leave unwanted jagged edges or missed areas. Always use the feathering and smoothing tools to enhance the cutout.
3. Choosing Inappropriate Backgrounds
Avoid using backgrounds that clash with the subject’s colors or themes. Opt for complementary tones and styles to create visually appealing results.
How Hypic Stays Ahead in 2025
Hypic Photo Editor continuously evolves to provide cutting-edge features:
- AI Upgrades: Advanced algorithms for more accurate subject detection.
- User Feedback Integration: Regular updates based on user suggestions.
- Cross-Platform Compatibility: Seamlessly edit photos on multiple devices without losing quality.
Benefits of Using the Cutout Tool in Hypic Photo Editor
The Cutout tool in Hypic Photo Editor has redefined the way users edit photos by offering innovative features tailored for efficiency and creativity. Here are the key benefits:
1. Time Efficiency
The AI-powered automatic cutout feature significantly reduces editing time by:
- Quickly detecting and isolating subjects.
- Providing ready-to-use results with minimal adjustments.
Use Case: Content creators can quickly edit multiple images for social media without compromising quality.
2. Professional-Grade Edits
With advanced edge refinement and customizable manual controls, users can achieve:
- Seamless subject isolation.
- High-quality results comparable to professional editing software.
Pro Tip: Combine the Cutout tool with Hypic’s advanced filters for stunning, studio-quality results.
3. Accessibility for All Skill Levels
Hypic Photo Editor’s intuitive interface ensures that:
- Beginners can use the automatic mode effortlessly.
- Professionals can access detailed manual controls for more precise edits.
4. Versatility Across Applications
The Cutout tool supports diverse applications, such as:
- E-Commerce Photography: Create clean product images with white backgrounds.
- Marketing Collaterals: Design advertisements or posters with isolated elements.
- Personal Projects: Enhance personal photos or create personalized greeting cards.
5. Affordable Alternative
Unlike other premium editing tools, Hypic offers an affordable solution with advanced features:
- No expensive subscriptions.
- All-in-one features without the need for additional software.
Real-World Examples of Using the Cutout Tool
Example 1: Enhancing Product Photography
An online store owner uses Hypic to:
- Remove backgrounds from product images.
- Replace them with clean white or themed backgrounds.
- Increase sales by presenting professional, attractive images.
Example 2: Crafting Social Media Content
Social media influencers often use the Cutout tool to:
- Highlight their subjects by isolating them from cluttered backgrounds.
- Replace the background with bold colors or graphics to attract attention.
Example 3: Creating Unique Artwork
Artists and designers leverage the Cutout tool for:
- Layered compositions in digital artwork.
- Seamless integration of multiple elements into a cohesive design.
Comparison: Hypic vs. Other Editing Tools
| Feature | Hypic Photo Editor | Competitor A | Competitor B |
|---|---|---|---|
| AI Automatic Cutout | Yes | Yes | No |
| Manual Refinement | Yes | Limited | Yes |
| Affordable Pricing | Yes | No | No |
| Built-In Templates | Yes | No | Yes |
| User-Friendly Interface | Yes | No | Yes |
Tips for Getting the Most Out of Hypic
- Update Regularly: Ensure you’re using the latest version to access new features.
- Experiment with Features: Combine the Cutout tool with filters, effects, and templates to maximize creative potential.
- Use Tutorials: Hypic offers built-in guides to help users get started quickly.
Conclusion
The Cutout tool in Hypic Photo Editor is a powerful, user-friendly feature designed to cater to the needs of beginners and professionals alike.
Whether you’re looking to isolate subjects, replace backgrounds, or create artistic compositions, this tool makes the process seamless and efficient.
Its AI-driven precision, manual customization options, and versatile applications ensure that users can produce professional-grade edits with ease.
In 2025, Hypic continues to set the standard for accessible and innovative photo editing tools.
By following the steps and tips outlined in this guide, you can fully utilize the Cutout tool to enhance your creative projects.
With its time-saving features and affordable pricing, Hypic Photo Editor is an excellent choice for anyone looking to elevate their photo editing experience.
FAQs
What is the Cutout tool in Hypic Photo Editor?
The Cutout tool is a feature in Hypic Photo Editor that allows users to isolate subjects from their backgrounds. It provides options for automatic, manual, and shape-based cutouts to cater to different editing needs.
Is the Cutout tool in Hypic Photo Editor easy to use?
Yes, the Cutout tool is designed for all skill levels. Beginners can rely on the AI-powered automatic mode, while professionals can utilize the manual and fine-tuning options for greater control.
Can I save a cutout with a transparent background?
Absolutely! Hypic Photo Editor allows users to save their cutouts as PNG files, which support transparent backgrounds, making them perfect for logos, digital art, or product images.
Does Hypic Photo Editor support batch processing for the Cutout tool?
Yes, Hypic offers a batch processing feature that enables users to apply the Cutout tool to multiple images simultaneously, saving time and effort.
Is Hypic Photo Editor free to use?
While Hypic Photo Editor offers a free version with basic features, advanced tools like the Cutout may require a subscription. However, it remains a cost-effective alternative to other premium photo editing software.